The following requires EXTRA_CONTRACT_REGISTRAR_ROLE on the account calling registerExtraContract.
- Encode the function call via multisigwallet-cli
npx msig encodeData [SKALE Chain-name] MessageProxyForSchain grantRole 0x6155b5aac15ce9aa193c0527a6f43be0a36a7e2e7496c2b615c0e5f922842773 [0x_ACCOUNT_TO_GRANT_EXTRA_CONTRACT_REGISTRAR_ROLE_TO]
- Execute via SAFE by following the steps here
/**
* Run:
* npm install ethers dotenv
*/

import { Contract, JsonRpcProvider, Wallet } from "ethers";
import dotenv from "dotenv";
dotenv.config();

const MSG_PROXY_SCHAIN_ADDR = "0xd2AAa00100000000000000000000000000000000";
const MSG_PROXY_SCHAIN_ABI = [
	"function grantRole(bytes32 role, address account) external"
];

const provider = new JsonRpcProvider(process.env.RPC_URL);
const wallet = new Wallet(process.env.PRIVATE_KEY, provider);
const contract = new Contract(MSG_PROXY_SCHAIN_ADDR, MSG_PROXY_SCHAIN_ABI, wallet);
const res = await contract.grantRole(id("EXTRA_CONTRACT_REGISTRAR_ROLE", "0x..."));
This is required since the SKALE Chain does default to giving Marionette EXTRA_CONTRACT_REGISTRAR_ROLE
Registering Contracts on a SKALE Chain
- via SAFE — would be if you give Marionette EXTRA_CONTRACT_REGISTRAR_ROLE on MessageProxyForSchain
- via Ethers v6 — would be if you gave an EOA the role and use Ethers
- Encode the function call via multisigwallet-cli
npx msig encodeData juicy-low-small-testnet MessageProxyForSchain registerExtraContract destination-skale-chain-name local-contract-address
- Execute via SAFE by following the steps here
/**
* Run:
* npm install ethers dotenv
*/

import { Contract, JsonRpcProvider, Wallet } from "ethers";
import dotenv from "dotenv";
dotenv.config();

const MSG_PROXY_SCHAIN_ADDR = "0xd2AAa00100000000000000000000000000000000";
const MSG_PROXY_SCHAIN_ABI = [
	"function registerExtraContract(string memory chainName, address extraContract)"
];

const provider = new JsonRpcProvider(process.env.RPC_URL);
const wallet = new Wallet(process.env.PRIVATE_KEY, provider);
const contract = new Contract(MSG_PROXY_SCHAIN_ADDR, MSG_PROXY_SCHAIN_ABI, wallet);
const res = await contract.registerExtraContract("elated-tan-skat", "0x...")); // elated-tan-skat is Europa Mainnet
Registering Contracts on Ethereum
- Go to SAFE App or your preferred frontend for SAFE.
- Press New Transaction and then Transaction Builder
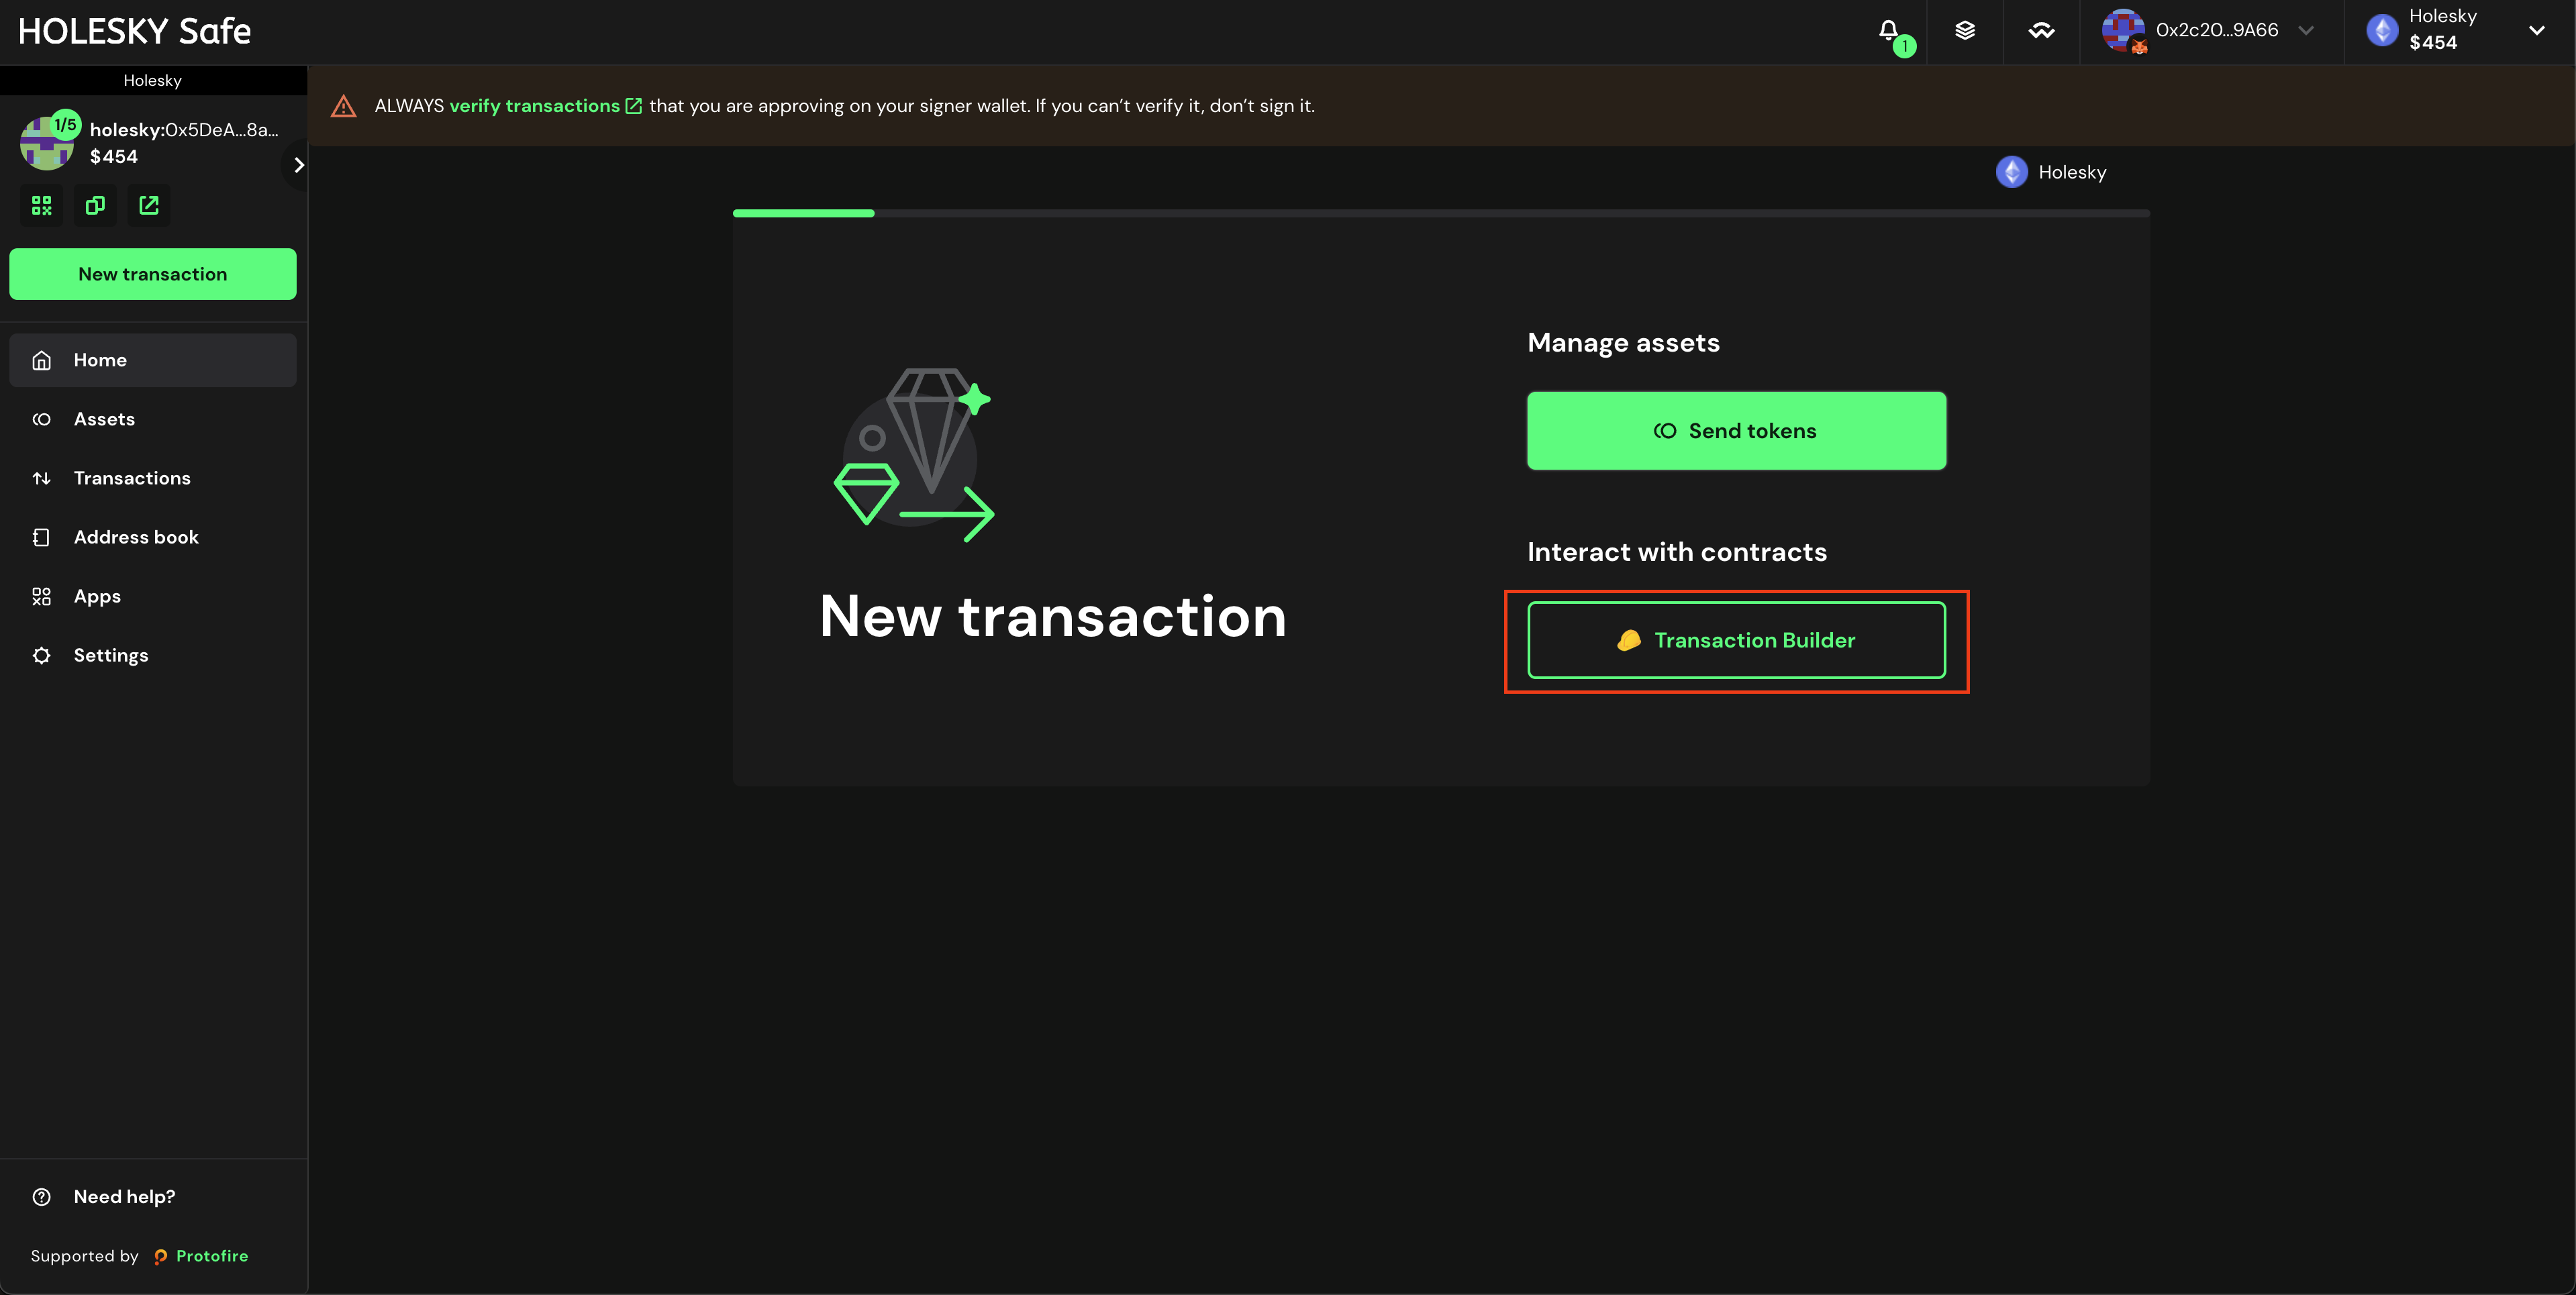
- Input the MessageProxy address for your correct environment into the Contract Address field and select Use Implementation ABI
Each SKALE Manager deployment — Mainnet, Testnet, etc. — has a smart contract called MessageProxy which is what sends data between Ethereum and SKALE Chains. Grab the correct address from the table below and verify by visiting the SKALE Network Releases Repo. | Network | Contract Address |
|---|
| Ethereum Mainnet | 0x8629703a9903515818C2FeB45a6f6fA5df8Da404 |
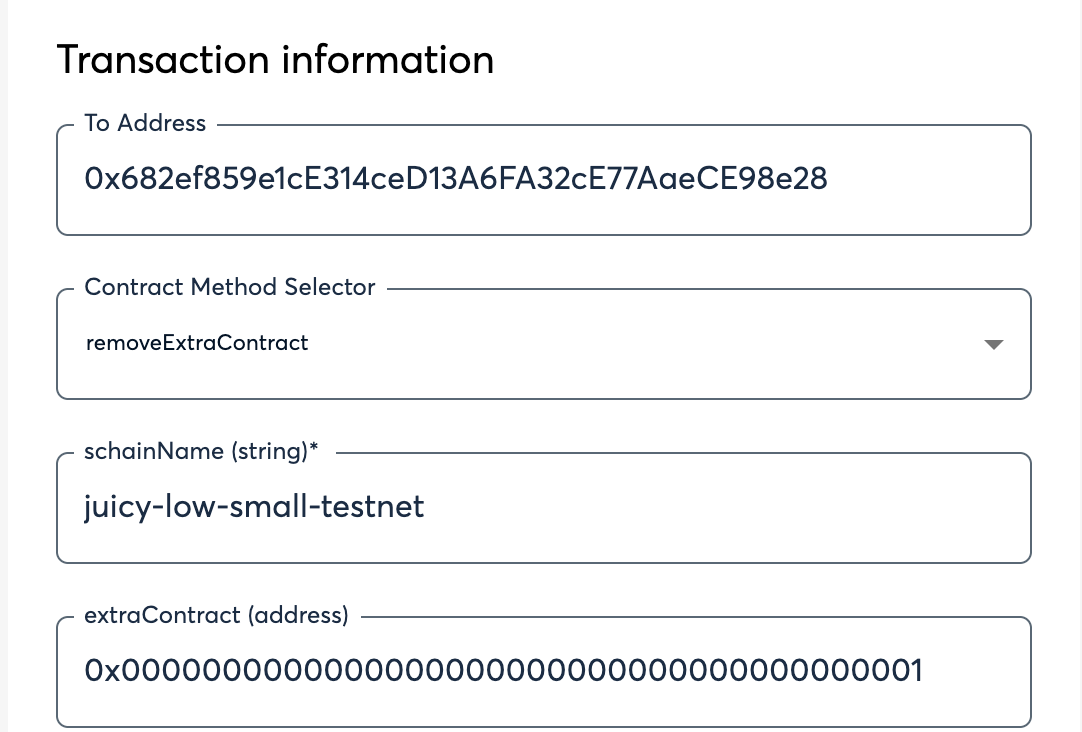
| Ethereum Holesky Testnet | 0x682ef859e1cE314ceD13A6FA32cE77AaeCE98e28 |
- Select
registerExtraContract from the dropdown list in Contract Method Selector, set the schainName (string) field (e.g elated-tan-skat), and set the extraContract (address) field which is the smart contract on Ethereum
- Click Add transaction, scroll down, and click Create Batch, then click Send Batch. Tenderly simulation is generally available, even on testnet, and is encouraged to be used to see all the changes occuring on the Ethereum side before they occur.