> ## Documentation Index
> Fetch the complete documentation index at: https://docs.skale.space/llms.txt
> Use this file to discover all available pages before exploring further.
# Connect Custom Contracts
> Learn how to connect your custom contracts via IMA
The following requires `EXTRA_CONTRACT_REGISTRAR_ROLE` on the account calling **registerExtraContract**.
## Adding Extra Contract Registrar Role on SKALE Chain
1. Encode the function call via [multisigwallet-cli](/developers/run-a-skale-chain/using-multisig-wallet-cli)
```shell theme={null}
npx msig encodeData [SKALE Chain-name] MessageProxyForSchain grantRole 0x6155b5aac15ce9aa193c0527a6f43be0a36a7e2e7496c2b615c0e5f922842773 [0x_ACCOUNT_TO_GRANT_EXTRA_CONTRACT_REGISTRAR_ROLE_TO]
```
2. Execute via SAFE by following the steps [here](/developers/run-a-skale-chain/using-safe#submit-transaction-to-safe)
```ts theme={null}
/**
* Run:
* npm install ethers dotenv
*/
import { Contract, JsonRpcProvider, Wallet } from "ethers";
import dotenv from "dotenv";
dotenv.config();
const MSG_PROXY_SCHAIN_ADDR = "0xd2AAa00100000000000000000000000000000000";
const MSG_PROXY_SCHAIN_ABI = [
"function grantRole(bytes32 role, address account) external"
];
const provider = new JsonRpcProvider(process.env.RPC_URL);
const wallet = new Wallet(process.env.PRIVATE_KEY, provider);
const contract = new Contract(MSG_PROXY_SCHAIN_ADDR, MSG_PROXY_SCHAIN_ABI, wallet);
const res = await contract.grantRole(id("EXTRA_CONTRACT_REGISTRAR_ROLE", "0x..."));
```
This is required since the SKALE Chain does default to giving Marionette EXTRA\_CONTRACT\_REGISTRAR\_ROLE
## Registering Contracts on a SKALE Chain
* **via SAFE** -- would be if you give Marionette EXTRA\_CONTRACT\_REGISTRAR\_ROLE on MessageProxyForSchain
* **via Ethers v6** -- would be if you gave an EOA the role and use Ethers
1. Encode the function call via [multisigwallet-cli](/developers/run-a-skale-chain/using-multisig-wallet-cli)
```shell theme={null}
npx msig encodeData juicy-low-small-testnet MessageProxyForSchain registerExtraContract destination-skale-chain-name local-contract-address
```
2. Execute via SAFE by following the steps [here](/developers/run-a-skale-chain/using-safe#submit-transaction-to-safe)
```ts theme={null}
/**
* Run:
* npm install ethers dotenv
*/
import { Contract, JsonRpcProvider, Wallet } from "ethers";
import dotenv from "dotenv";
dotenv.config();
const MSG_PROXY_SCHAIN_ADDR = "0xd2AAa00100000000000000000000000000000000";
const MSG_PROXY_SCHAIN_ABI = [
"function registerExtraContract(string memory chainName, address extraContract)"
];
const provider = new JsonRpcProvider(process.env.RPC_URL);
const wallet = new Wallet(process.env.PRIVATE_KEY, provider);
const contract = new Contract(MSG_PROXY_SCHAIN_ADDR, MSG_PROXY_SCHAIN_ABI, wallet);
const res = await contract.registerExtraContract("elated-tan-skat", "0x...")); // elated-tan-skat is Europa Mainnet
```
## Registering Contracts on Ethereum
1. Go to [SAFE App](https://safe.global) or your preferred frontend for SAFE.
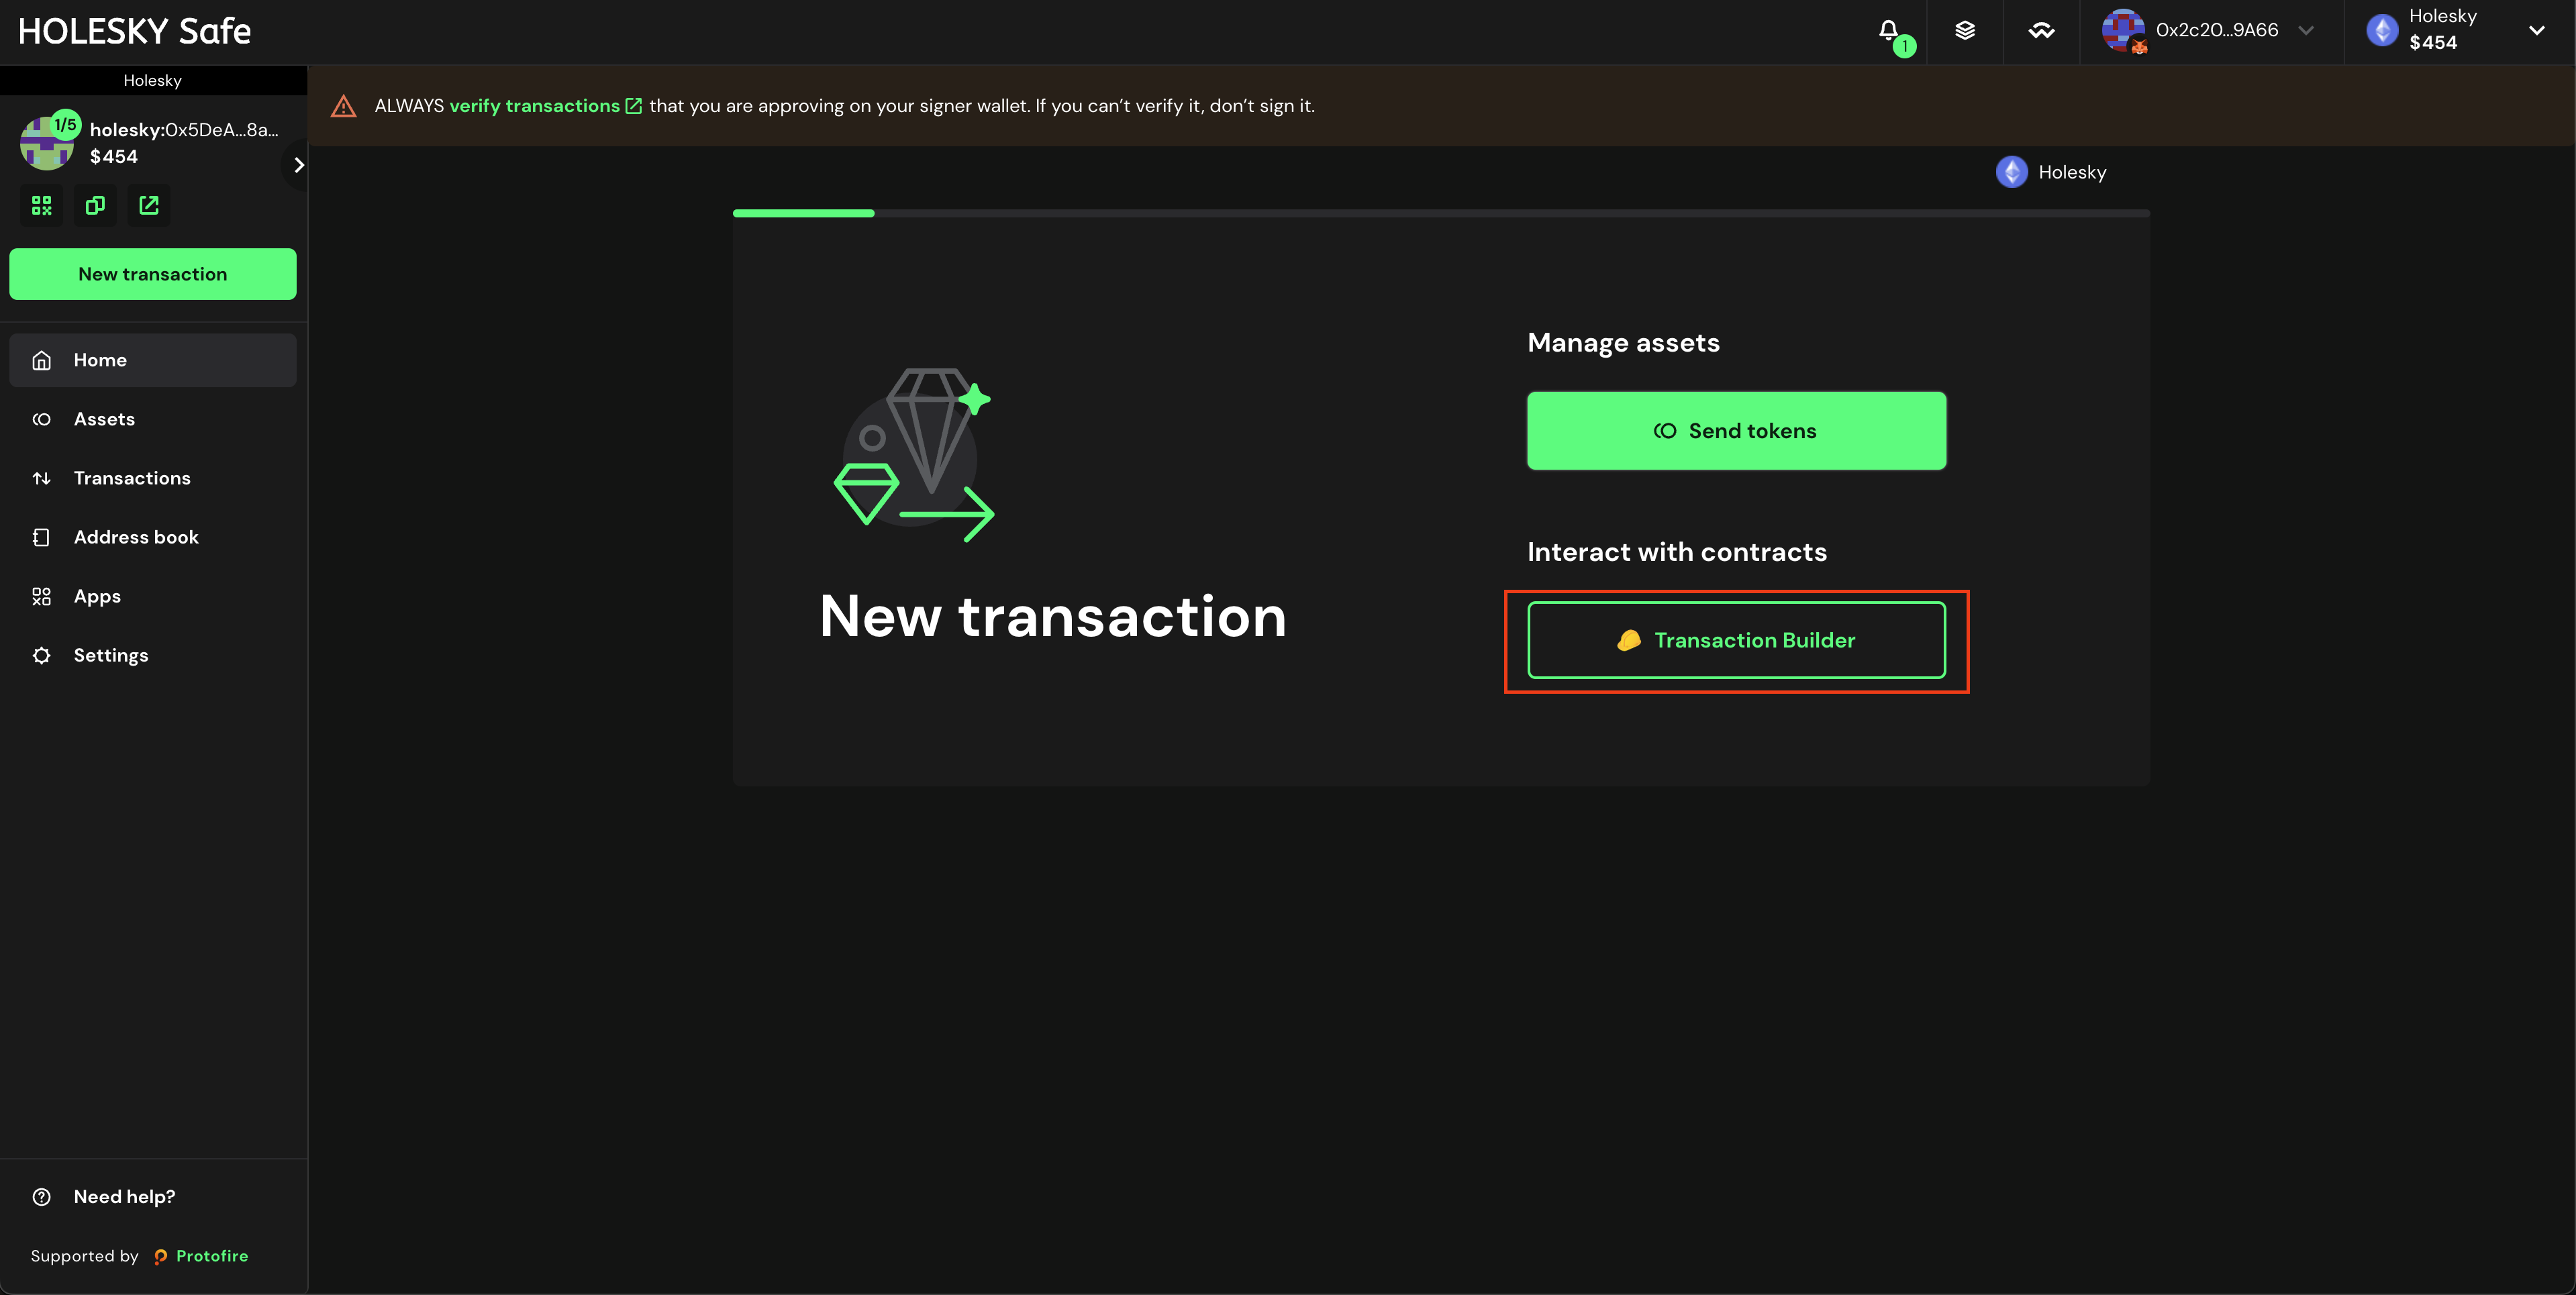
2. Press **New Transaction** and then **Transaction Builder**
 3. Input the MessageProxy address for your correct environment into the **Contract Address** field and select **Use Implementation ABI**
Each SKALE Manager deployment -- Mainnet, Testnet, etc. -- has a smart contract called MessageProxy which is what sends data between Ethereum and SKALE Chains. Grab the correct address from the table below and verify by visiting the SKALE Network [Releases Repo](https://github.com/skalenetwork/concepts/tree/master/releases).
**MessageProxy Contract Addresses**
| Network | Contract Address |
| ------------------------ | ------------------------------------------ |
| Ethereum Mainnet | 0x8629703a9903515818C2FeB45a6f6fA5df8Da404 |
| Ethereum Holesky Testnet | 0x682ef859e1cE314ceD13A6FA32cE77AaeCE98e28 |
4. Select `registerExtraContract` from the dropdown list in *Contract Method Selector*, set the *schainName (string)* field (e.g elated-tan-skat), and set the *extraContract (address)* field which is the smart contract on Ethereum
3. Input the MessageProxy address for your correct environment into the **Contract Address** field and select **Use Implementation ABI**
Each SKALE Manager deployment -- Mainnet, Testnet, etc. -- has a smart contract called MessageProxy which is what sends data between Ethereum and SKALE Chains. Grab the correct address from the table below and verify by visiting the SKALE Network [Releases Repo](https://github.com/skalenetwork/concepts/tree/master/releases).
**MessageProxy Contract Addresses**
| Network | Contract Address |
| ------------------------ | ------------------------------------------ |
| Ethereum Mainnet | 0x8629703a9903515818C2FeB45a6f6fA5df8Da404 |
| Ethereum Holesky Testnet | 0x682ef859e1cE314ceD13A6FA32cE77AaeCE98e28 |
4. Select `registerExtraContract` from the dropdown list in *Contract Method Selector*, set the *schainName (string)* field (e.g elated-tan-skat), and set the *extraContract (address)* field which is the smart contract on Ethereum
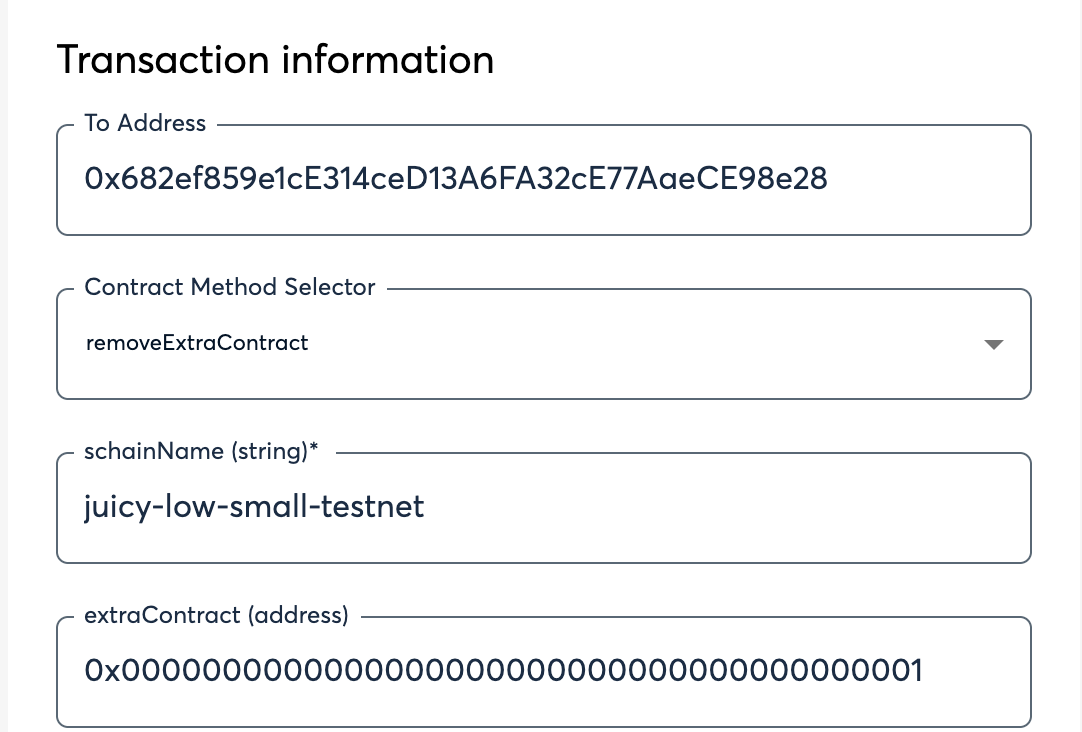 5. Click **Add transaction**, scroll down, and click **Create Batch**, then click **Send Batch**. [Tenderly](https://tenderly.co/) simulation is generally available, even on testnet, and is encouraged to be used to see all the changes occuring on the Ethereum side before they occur.